

Just starting out in the kitchen? Don’t worry – you don’t need to be a master chef to whip up something tasty. With a few clever tricks, cooking can feel a lot less overwhelming and a lot more fun. Whether you’re learning how to boil pasta or figuring out how to keep your cutting board from sliding around, these beginner-friendly hacks will help you feel more confident and comfortable in the kitchen.
1. Salt Your Water for Boiling
Adding salt to water before boiling pasta, potatoes, or vegetables enhances the flavor of the food by allowing some of the salt to be absorbed during cooking. Salt raises the boiling point of water slightly, but the effect is minimal and doesn’t significantly alter cooking time. The primary reason for salting water is seasoning. For pasta, which doesn’t contain salt on its own, this step is essential to avoid bland results. In vegetables, salting can help retain some of their natural color and improve their taste. The typical amount is about one to two tablespoons of salt per gallon of water, but this can be adjusted depending on the dish and personal preference. It’s important not to oversalt, as some of the salt remains in the water and does not transfer fully to the food. Stirring the salt in before adding the food helps distribute it evenly.
Helps With:
- Seasoning pasta, potatoes, and vegetables during cooking
- Enhancing natural flavors of food
- Preventing bland results in unsalted base ingredients
- Retaining color in some vegetables
- Improving overall dish balance without additional sauces
When to Use It:
- Boiling pasta or noodles
- Cooking whole or chopped potatoes
- Blanching green beans, broccoli, or asparagus
- Preparing grains like farro or quinoa
- Making homemade soups that start with boiled ingredients
2. Read the Entire Recipe Before You Start
Reading a full recipe before doing anything in the kitchen is one of the most foundational practices for any cook. It ensures you understand the steps, have all the necessary ingredients, and can plan your timing correctly. Recipes often include time-sensitive actions (like simmering immediately after sautéing), and missing a step can result in undercooked or overcooked food. Additionally, some recipes use shorthand or assume prior knowledge of terms like “deglaze” or “al dente,” which might confuse beginners if not reviewed ahead of time. Familiarizing yourself with the entire process helps reduce mistakes, avoid surprises, and create a smoother cooking experience overall. This habit supports better preparation and ultimately leads to more consistent results in the kitchen.
Helps With:
- Avoiding missed steps during cooking
- Preventing under- or overcooked food
- Ensuring all ingredients and tools are on hand
- Reducing cooking stress and confusion
- Improving kitchen time management
When to Use It:
- Trying a new recipe for the first time
- Preparing meals with multiple steps or ingredients
- Cooking dishes that require precise timing
- Baking, where accuracy is especially important
- Planning meals in advance to avoid grocery trips mid-cook
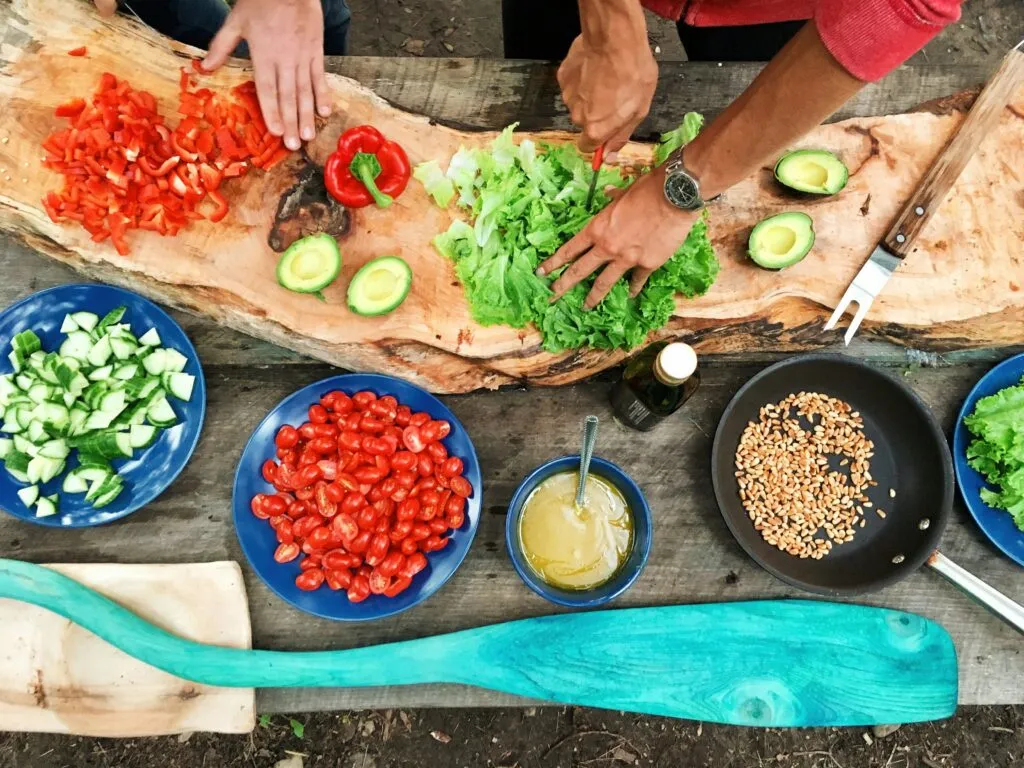
3. Use a Sharp Knife
A sharp knife is not just about precision – it’s about safety, efficiency, and preserving the quality of your ingredients. Dull knives require more force to cut through food, increasing the likelihood of slipping and accidental cuts. A sharp knife slices cleanly, reducing damage to delicate ingredients like herbs, fruits, and vegetables, and helping them retain their natural flavors and textures. In culinary training, knife maintenance is considered essential, and home cooks benefit equally from using sharp tools. Regular honing and periodic sharpening ensure your blade performs well. Understanding how to use a knife safely also supports better control and consistency, which is especially helpful when prepping ingredients for even cooking. Beginners often find cooking more enjoyable and less frustrating when their knife works with them rather than against them.
Helps With:
- Improving chopping accuracy and speed
- Preventing slips and injuries in the kitchen
- Preserving texture and flavor of ingredients
- Enhancing presentation of sliced foods
- Reducing fatigue during food prep
When to Use It:
- Cutting firm vegetables like carrots or onions
- Prepping meats or trimming fat
- Chopping fresh herbs or leafy greens
- Slicing bread or tomatoes cleanly
- Dicing ingredients for even cooking
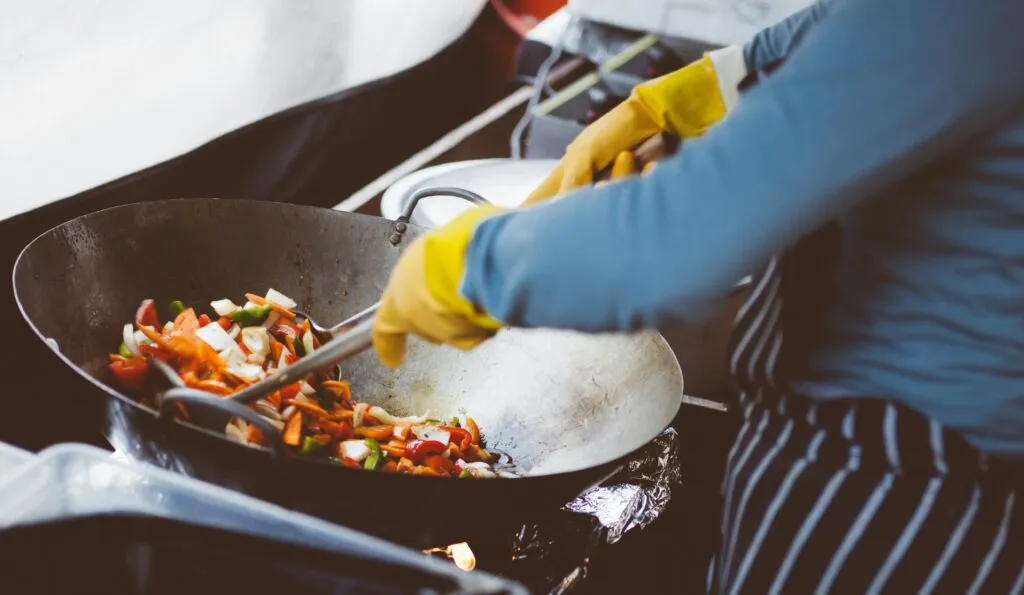
4. Use Salt in Multiple Stages
Salt is a fundamental ingredient that enhances flavor, but it’s not just about sprinkling it at the end of cooking. Professional chefs recommend salting in stages to build layers of flavor throughout the cooking process. For example, seasoning vegetables early in the cooking process ensures they absorb the salt, while a final sprinkle before serving can add a burst of flavor. Salt can also help break down vegetables and meats during cooking, improving their texture and flavor. Different types of salt (like kosher, sea, or table salt) also have varying levels of salinity, so adjusting the amount based on the type is crucial. By using salt wisely throughout, you’ll create more flavorful and balanced dishes.
Helps With:
- Enhancing overall flavor
- Improving texture in meats and vegetables
- Bringing out natural sweetness in food
- Creating well-balanced dishes
- Building depth of flavor
When to Use It:
- Seasoning vegetables while sautéing
- Adding to pasta water for seasoning
- Marinating meats
- Sprinkling on salads
- Flavoring sauces or soups
5. Freeze Herbs in Olive Oil
Preserving fresh herbs can be challenging, as they often wilt or lose flavor quickly. A simple solution is to freeze them in olive oil. Chop the herbs, place them in an ice cube tray, and cover them with olive oil. Once frozen, you can store the cubes in a sealed bag and use them whenever needed. This hack ensures that you always have fresh herbs available for soups, sauces, or stir-fries, even if they’re out of season.
Helps With:
- Extending the shelf life of fresh herbs
- Preventing wilting or browning
- Adding fresh herbs to cooked dishes easily
- Reducing food waste
- Preserving the flavor of seasonal herbs
When to Use It:
- When you have excess fresh herbs
- Preparing dishes that require quick herb flavor
- Adding to soups or stews
- Cooking sauces or dressings
- Flavoring oils or marinades
6. Use a Cold Spoon to Measure Honey
Measuring sticky ingredients like honey can be frustrating, but a cold spoon makes the process easier. Simply chill your spoon in the freezer for a few minutes before using it to scoop honey. The cold spoon prevents the honey from sticking, allowing it to slide off easily without leaving a mess. This technique works for other sticky ingredients like syrup, molasses, or peanut butter as well.
Helps With:
- Preventing sticky messes
- Making measuring easier
- Reducing waste from sticky ingredients
- Speeding up the cooking process
- Maintaining cleanliness in the kitchen
When to Use It:
- Measuring honey, molasses, or syrup
- Using sticky ingredients for baking
- Preparing marinades or dressings
- When making granola or energy bars
- Preparing homemade sauces or dips
7. Use Leftovers for New Dishes
Leftovers don’t have to be boring or repetitive. With a little creativity, you can transform yesterday’s meal into something entirely new. For example, leftover roasted vegetables can be turned into a soup or used in an omelet. Cooked chicken can be repurposed into a salad or sandwich filling. Repurposing leftovers not only reduces food waste but also saves time and money. Storing leftovers properly, in airtight containers, ensures they remain fresh for future use. Using a variety of herbs, spices, or sauces can breathe new life into dishes, making them feel like an entirely new meal.
Helps With:
- Reducing food waste
- Saving time on meal prep
- Saving money on groceries
- Creating new flavor profiles
- Stretching ingredients further
When to Use It:
- After a large dinner
- When you have extra grains or proteins
- To refresh last night’s vegetables
- For making lunch with dinner leftovers
- When preparing snacks or side dishes

8. Use a Pizza Stone for Crispy Crusts
A pizza stone helps create a crispy, restaurant-quality crust by evenly distributing heat across the pizza dough. Preheating the stone in the oven before placing your pizza on it ensures that the dough cooks quickly and crisps up. This method is perfect for homemade pizzas, flatbreads, or even reheating frozen pizza for a crispier finish. The porous surface of the stone absorbs moisture from the dough, resulting in a crunchier texture.
Helps With:
- Achieving crispy pizza crusts
- Even heat distribution
- Cooking pizza quickly and uniformly
- Preventing soggy pizza bases
- Reheating pizza for better texture
When to Use It:
- When baking homemade pizza
- Reheating leftover pizza
- Making flatbreads or focaccia
- When preparing thin-crust pizza
- For a crispy, golden crust
9. Use a Timer for Consistency
Using a timer is essential for achieving consistent results, especially when baking or cooking dishes with specific cooking times. Without a timer, it’s easy to get distracted and overcook or undercook your food. Many recipes, especially for baked goods, require precise timing to achieve the correct texture and flavor. A timer takes the guesswork out of cooking, ensuring you reach the optimal cooking window. It’s a simple tool, but an essential one for both beginners and experienced cooks. Whether you’re boiling eggs, roasting vegetables, or making a batch of cookies, setting a timer guarantees better, more reliable results.
Helps With:
- Preventing overcooking or undercooking
- Maintaining consistency in recipes
- Managing multiple cooking tasks
- Improving timing accuracy
- Creating predictable results
When to Use It:
- When baking cakes, cookies, or bread
- Cooking pasta or rice
- Roasting meats or vegetables
- Boiling eggs or potatoes
- Simmering sauces or soups
10. Cook with a Lid on to Retain Moisture
Cooking with a lid on your pan can help retain moisture and heat, speeding up the cooking process while preserving flavor and nutrients. This method is especially useful for dishes that require slow cooking or simmering, such as stews, soups, or braises. By trapping steam inside the pan, the lid keeps the food from drying out, ensuring a tender, juicy result. This technique also helps maintain an even temperature throughout the dish. However, it’s important to check occasionally to prevent overcooking, as the lid can cause condensation that drips back into the pan. For delicate ingredients like fish, a lid helps cook evenly without drying out.
Helps With:
- Retaining moisture in food
- Speeding up cooking times
- Maintaining even cooking temperatures
- Preventing drying out
- Keeping flavors locked in
When to Use It:
- Simmering soups or stews
- Braising meats or vegetables
- Steaming grains or rice
- Cooking fish or chicken
- Preparing slow-cooked dishes
11. Let Meat Rest After Cooking
Letting meat rest after cooking is a process supported by both culinary training and food science. When meat is cooked, the juices inside are pushed toward the center due to heat. If it is cut immediately, those juices are released, leaving the meat dry. Resting allows time for the internal temperature to equalize and for the juices to redistribute throughout the muscle fibers. The appropriate resting time varies depending on the size and type of the meat. For small cuts like steak, 5 – 10 minutes is usually sufficient, while roasts may require 15 – 20 minutes. During this time, carryover cooking continues, and the meat finishes reaching its target temperature. This technique is used in both home and professional kitchens to maintain moisture and texture. It’s particularly effective when used with properly cooked meat that has been measured with a food thermometer for safety.
Helps With:
- Retaining moisture inside the meat
- Enhancing texture and mouthfeel
- Allowing even internal temperature
- Reducing juice loss on cutting boards
- Supporting better slicing
When to Use It:
- Cooking steaks or chops
- Roasting poultry or beef
- Preparing pork tenderloin
- Finishing grilled meat
- Serving meat hot without drying it
12. Use Acid to Balance Flavors
Acidity plays a critical role in balancing dishes. Sour elements like lemon juice, vinegar, or fermented foods provide contrast to richness or sweetness and can brighten the overall flavor profile. In culinary traditions worldwide, acids are often used to cut through fat, heighten aroma, or enhance natural sweetness. For example, a dash of lemon juice in a soup can highlight umami and freshness, while a splash of vinegar in a stew can balance heavy meats. Acids also affect chemical processes in cooking, such as when vinegar is used in marinades to tenderize protein or in pickling to preserve vegetables. The key is moderation – too much acid can overwhelm a dish. Acidity should be added gradually and tasted along the way. Knowing how to balance it with salt, fat, and sweetness is foundational in culinary techniques and recipe development.
Helps With:
- Balancing sweet or fatty flavors
- Highlighting natural ingredient flavors
- Adding brightness to dull dishes
- Tenderizing proteins in marinades
- Preserving freshness in sauces
When to Use It:
- Making vinaigrettes or dressings
- Preparing rich soups or stews
- Cooking fatty meats or fish
- Finishing pasta or vegetables
- Adjusting sauces or dips
13. Use the Pasta Water
Pasta water contains starch that’s released as pasta cooks. This starch makes it useful for emulsifying sauces and helping them cling better to noodles. It’s commonly used in Italian cooking, especially with oil- or butter-based sauces. The starch thickens the sauce naturally and helps it bind with the pasta, reducing the need for extra fats or cream. The salt in pasta water, if properly seasoned, can also contribute to overall flavor. A few tablespoons of pasta water are usually enough, but it should be added gradually and whisked into the sauce off heat or while simmering. Pasta water can also revive leftover sauces or loosen thick ones. This technique is simple but backed by reliable kitchen experience and a clear understanding of how starch works in hot liquids.
Helps With:
- Thickening and binding sauces
- Helping sauces stick to noodles
- Enhancing flavor with residual salt
- Reducing the need for extra thickeners
- Improving pasta texture
When to Use It:
- Making carbonara, cacio e pepe, or Alfredo
- Combining pasta and sauce in a single pan
- Finishing creamy or tomato-based sauces
- Reheating pasta dishes
- Loosening thick sauces without diluting flavor

14. Keep Herbs Fresh Longer
Herbs spoil quickly due to their high water content and delicate structure. However, they can be stored more effectively with moisture control and reduced air exposure. For soft herbs like parsley or cilantro, trimming the stems and placing them in water (like flowers) with a loose plastic cover helps maintain hydration while reducing wilting. Hard herbs like rosemary or thyme do better wrapped in a slightly damp paper towel and stored in a sealed container. Refrigeration is generally best for most herbs, though basil prefers room temperature. Proper storage limits oxidation and moisture loss, preserving both color and flavor. These storage methods are common in professional kitchens and recommended in food safety guidance to reduce waste and maintain ingredient quality over time.
Helps With:
- Slowing down wilting and spoilage
- Preserving color and aroma
- Reducing food waste
- Keeping herbs usable for longer
- Retaining flavor for cooking
When to Use It:
- Buying herbs in bulk
- Prepping meals ahead of time
- Storing leftover bunches
- Cooking frequently with fresh herbs
- Keeping herbs vibrant for garnishes
15. Crack Eggs on a Flat Surface
Cracking an egg on a flat surface, rather than the edge of a bowl, results in a cleaner break and reduces the chance of shell fragments falling into the food. A flat surface causes the shell to break inward, keeping the contents contained and making it easier to open with your fingers. This method also helps avoid contaminating the inside of the egg with bacteria from the shell, which can occur more easily when egg contents are forced against a sharp edge. This practice is recommended in culinary schools and by food safety experts, especially when working with large batches of eggs. It is particularly useful when separating yolks or avoiding egg shell contamination in batters and doughs.
Helps With:
- Minimizing egg shell fragments in food
- Reducing risk of cross-contamination
- Keeping yolks intact for separating
- Making cleaner breaks in shells
- Improving efficiency with multiple eggs
When to Use It:
- Baking cakes or cookies
- Preparing scrambled or fried eggs
- Making omelets or frittatas
- Separating egg whites
- Cooking with large quantities of eggs
16. Use a Dutch Oven for Even Cooking
A Dutch oven is a versatile, heavy-duty pot that excels in evenly distributing heat. It’s perfect for slow-cooking, braising, roasting, and making stews or soups. Its thick walls and tight-fitting lid help retain moisture, making it ideal for cooking meats and vegetables to perfection without drying out. Whether you’re cooking a hearty stew, baking bread, or preparing a roast, this all-in-one cookware ensures uniform cooking. The heat retention of a Dutch oven also allows for a better flavor development, especially for long, slow-cooked dishes.
Helps With:
- Even heat distribution
- Retaining moisture in dishes
- Slow-cooking and braising
- Developing rich, deep flavors
- Versatile one-pot cooking
When to Use It:
- Slow-cooking stews or soups
- Roasting meats
- Baking bread
- Braising vegetables
- Preparing chili or sauces
17. Keep a Garbage Bowl Handy
A garbage bowl is a simple yet highly effective tool that can streamline your cooking process and minimize cleanup. Instead of running back and forth to the trash can, keep a bowl nearby to dispose of scraps, peels, and other waste as you prep your ingredients. This hack keeps your workspace clean and organized, allowing you to focus more on cooking and less on cleaning. It’s especially helpful during lengthy prep sessions or when working with ingredients that generate a lot of waste, like fruits and vegetables.
Helps With:
- Reducing clutter on your kitchen counter
- Streamlining food prep
- Avoiding trips to the trash can
- Keeping the kitchen organized
- Simplifying cleanup
When to Use It:
- When prepping fruits and vegetables
- During batch cooking
- Making dishes that involve peeling or chopping
- When working with ingredients that require a lot of trimming
- Preparing multiple dishes at once
18. Use a Baking Sheet for More Than Just Baking
A baking sheet, or cookie sheet, can be used for much more than baking cookies or roasting vegetables. You can use it for reheating food, making sheet pan meals, or even cooking breakfast like bacon or eggs. It provides a flat, even surface that allows food to cook uniformly, making it ideal for roasting meats and veggies in the oven. For an easy cleanup, line the baking sheet with parchment paper or foil. The versatility of a baking sheet makes it an essential kitchen tool.
Helps With:
- Even heat distribution
- Easy cleanup
- Multi-purpose cooking
- Roasting, reheating, and baking
- Preparing sheet pan meals
When to Use It:
- Roasting vegetables
- Baking cookies or pastries
- Cooking bacon in the oven
- Making sheet pan dinners
- Reheating leftovers
19. Soak Wooden Utensils Before Use
Wooden spoons, spatulas, and other utensils are prone to absorbing moisture, which can cause them to crack or warp over time. Instead of soaking wooden utensils, coat them with food-grade mineral oil periodically to protect against moisture and extend their lifespan. Before use, ensure they are clean and dry to maintain their condition.
Helps With:
- Preventing wood from cracking
- Keeping utensils in good condition
- Extending the life of wooden tools
- Preventing splinters in utensils
- Maintaining utensil shape
When to Use It:
- Before using wooden spoons for stirring
- When preparing foods with high moisture content
- Cooking with hot oil or liquids
- Stirring sauces or soups
- Using wooden spatulas for grilling
20. Use Leftover Coffee Grounds as a Meat Rub
Consider using coffee grounds sparingly in a spice rub for meats, combined with complementary spices like paprika or chili powder, to add a subtle earthy flavor. Test the mixture on a small portion first, as coffee grounds can impart bitterness or an undesirable texture. This hack is an excellent way to recycle coffee waste and elevate your dishes with minimal effort.
Helps With:
- Recycling coffee grounds
- Enhancing the flavor of meats
- Creating a unique crust on meats
- Adding depth to grilled dishes
- Reducing food waste
When to Use It:
- When grilling steaks or burgers
- Roasting pork or lamb
- Preparing beef or venison
- When looking for a rich, smoky flavor
- Experimenting with new seasoning combinations
Conclusion
Cooking can feel a bit overwhelming at first, but with the right tips and tricks, it doesn’t have to be. These cooking hacks are simple, practical, and designed to make your time in the kitchen more efficient and fun. Whether it’s mastering a foolproof way to cook meat or finding smart ways to organize your prep, these hacks are all about making cooking easier and more enjoyable for beginners.
Remember, the key to getting comfortable in the kitchen is to keep experimenting, stay organized, and don’t be afraid to make mistakes. As you try out these tips, you’ll gain confidence and start to find your own cooking style. Before you know it, you’ll be whipping up delicious meals like a pro!
FAQ
1. What are some easy cooking hacks for beginners?
Some easy cooking hacks include using a garbage bowl for scraps, keeping a sharp knife for quick chopping, using a Dutch oven for even cooking, and freezing herbs in olive oil to preserve freshness. These simple tips can make cooking faster and less stressful.
2. How can I make cooking easier if I’m just starting?
Start by organizing your kitchen and keeping essential tools handy. Use pre-chopped vegetables or frozen ingredients, and always read recipes through before starting. Simple tricks like prepping ingredients beforehand or using a double boiler for melting chocolate can save you time and effort.
3. Can I save time with meal prep?
Yes! Meal prep is a game-changer. Chop vegetables in advance, batch-cook grains, or prep a few days’ worth of meals at once. This will make daily cooking faster and less stressful, especially when you’re just starting out.
4. What kitchen tools are must-haves for beginners?
Some must-have tools include a sharp chef’s knife, a cutting board, a non-stick pan, a Dutch oven, a baking sheet, and a few basic measuring cups and spoons. These simple tools can help you cook most recipes with ease.
5. How do I prevent my food from burning or overcooking?
One of the best ways to prevent burning is to use the right heat level for different types of cooking. Start with lower heat and increase as necessary. Also, invest in an oven thermometer, and use timers to help keep track of cooking times for accuracy.
6. What’s the best way to store fresh herbs?
Freezing herbs in olive oil is a great way to keep them fresh. Simply chop herbs, place them in an ice cube tray, and cover with olive oil. Once frozen, store the cubes in a sealed bag and use them when needed for soups, sauces, or other dishes.
7. Why should I use a Dutch oven?
A Dutch oven provides even heat distribution and moisture retention, making it perfect for slow cooking, braising meats, or baking bread. It’s incredibly versatile and helps ensure that your meals cook evenly and stay tender.
8. How can I make my salads taste better without using store-bought dressing?
Making your own salad dressing is simple and allows you to control the ingredients. Start with a basic vinaigrette (oil, vinegar, mustard) and add your favorite herbs, spices, or citrus for a fresh, customized flavor that’s much healthier than store-bought options.
Leave a Reply